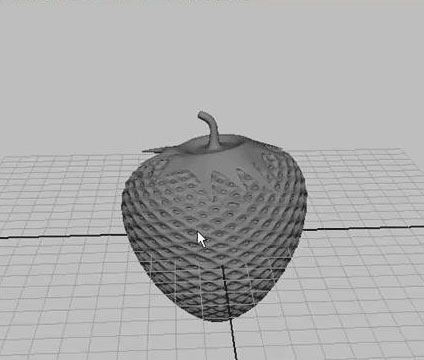
In this tutorial we are going to model a Strawberry with Polygons.

Here is Hand-On Exercise of this tutorial …………..!
We are going deep in polygonal editing, we are going to lean about a very power full tool of Maya called Soft select tool.
1) Go ahead and create a polygonal shaper with the default settings, and on the shaded mode
2) Now for editing right click on the shaper and select the vertex.
3) Select some of vertex and move them.
Note: – One of thing you will see while moving large group of vertxseces you are going to get hard edges around the points you are moving those.
A point where you want to move the movements more organelle if called soft selection.
Now question is that how you do that? How to use soft selection? How to find soft selection? And how soft selection work? Well it’s very easy as you know that there is so many tool in the Maya most of them you see on your screen some or in the tool bars, but there are more tools in the selection and movements tool also. How you reach to more tools in Maya?It’s also very simple just dabble click any one of the move, rotate or select tool.
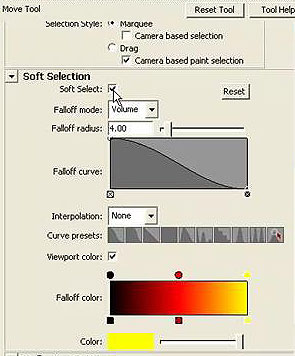
When you dabble click on any of the tool on the place of where channel box appear you will see a new panel pops up this is what I call tools children. You don’t have to remember this way it is just what I call!! Ok so if you dabble click on the move tool you’ll see in a move tools tool menu. Scroll it down a little till you see a section there by the name of Soft Selection. This really handy and very useful for the object we are going to make just after the introdeuction of the soft selection tool.
4) Now if the sphere is still selected and the vertex also as we let before then we are ready to go farther but if we are not then go to the
Create > Polygon > Sphere
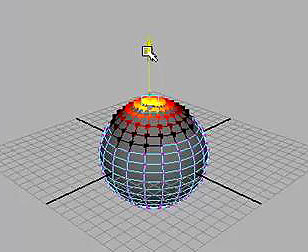
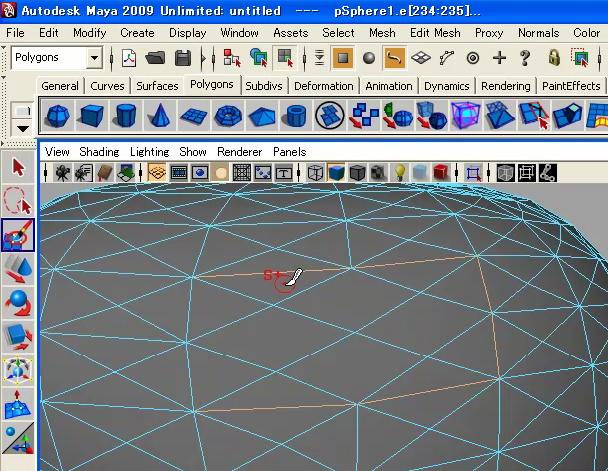
And create a poly sphere with default settings and select the top Vertex by right clicking on the sphere.
5) Now open the Move tool by dabble click on the move tool and on soft selection (to one the soft selection you have to click in the soft selection box)
Note : – Now you will see there is the vertices you have selected become yellow. Under Soft Selection you see falloff mode and falloff radius what this is? From here you can dial in the radius over the selection the soft selection will effective. So now any vertex you will select now has falloff and everything is selected move 100% with the radius falloff. Let’s move any of the vertex you will see now the movement is very different and move organic then before. This is very heady and power full way to model organically. Thing not work just for the move tool also for scale and rotate tool, and more about the tool you can choose Curve presets form carve presets also.
If you turn on this for one tool it will on for the other scale and rotate tool also you after using the soft selection don’t forget to off the soft selection.
One last thing I like to explain about is the reflection tool under the soft selecting. This is also so Help full when we want to model some organic object and its metrical on the reflection and move any of the vertex you will see that the opposite axis any of one you have select the reflecting take command on X, Y or Z the axis move with the selection. This is also very help full and save over time on some places just keep in mind that it’s there because we might use this also in out object we are going to make. Now we are ready to move on let’s stat modeling the strawberry.
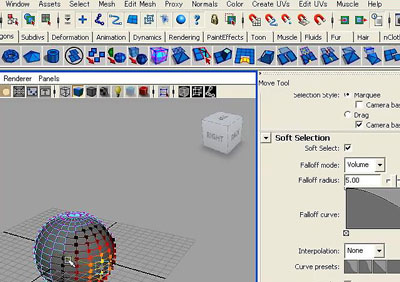
6) First of all create a sphere select the vertex and on the soft selection form the move tool
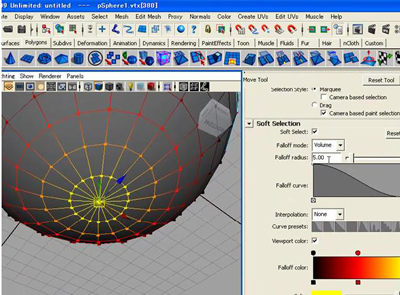
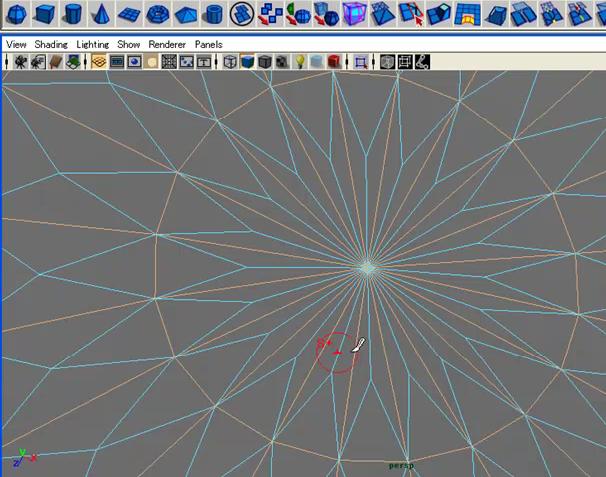
7) Now select one of the vertex of one corner set the valium of the radius to 4 , move vertex in Z axis not do the same in the opposite side while you see that sphere look like strawberry.
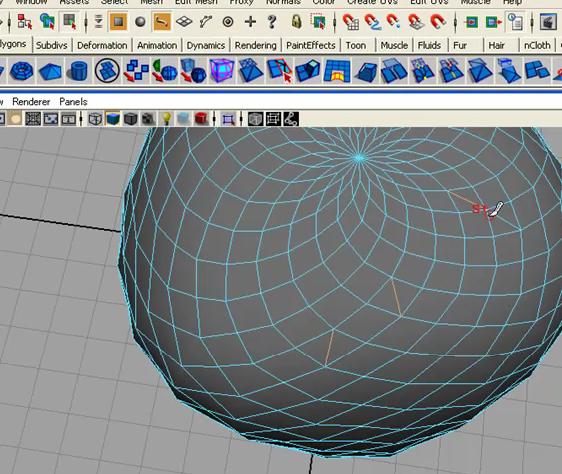
8) Now select the vertex of down side and change the radius to 2 and just move down a little.
9) Now deselect the soft selecting tool and go in object mode.
10) By using the scale tool scale the sphere as much you see the strawberry looks good.
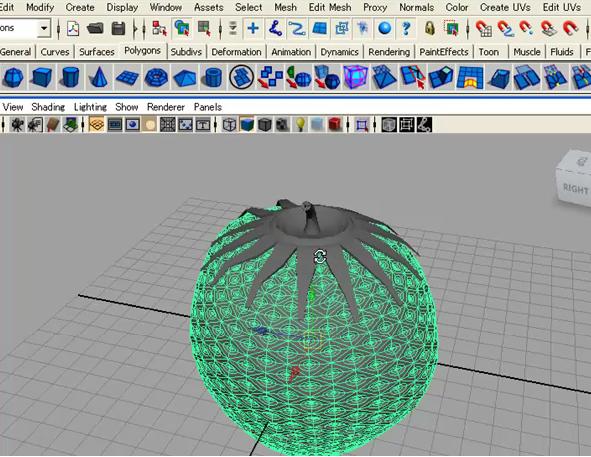
11) Select the all faces of the object and go in Edit mash
Edit mash > Pock face
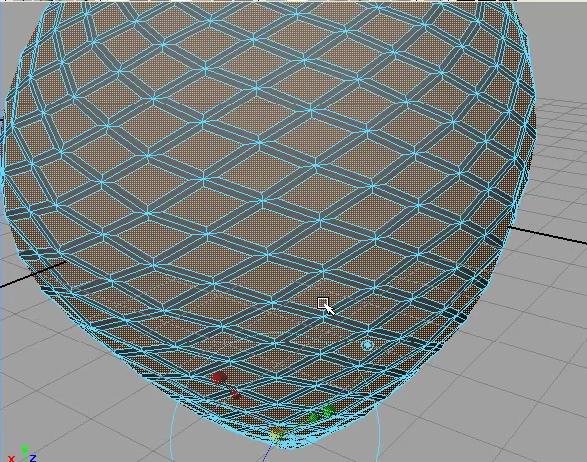
We just added more edges in our object now we have to deselect all of edges we don’t need. Delete the horizontal and vertical edges beside of edges which are in 45 degree angles and create every single face shape like diamond
Like the picture below
12) Next select the all faces again and this time open the Mash and deselect the keep face to gather
Mash > Keep face together
13) Now use the extrude select the scale point of extrude
Edit mash > extrude
And scale form center and move just a little out.
14) Once aging select the extrude tool
Edit Mash > extrude
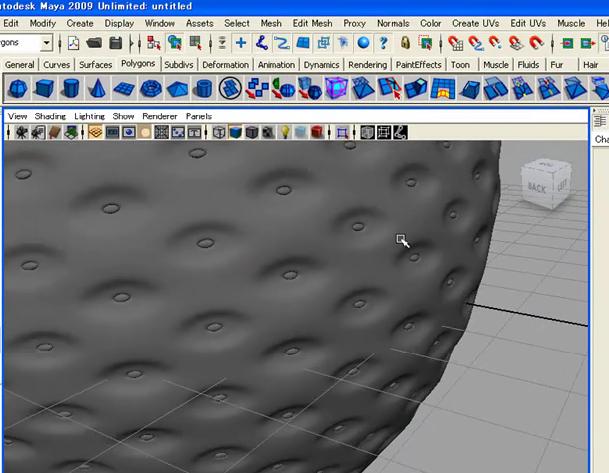
15) Now once move inside just a little and repute the extrude once aging and this time just move the face out
That is all press 3 or smooths the object we just created the strawberry
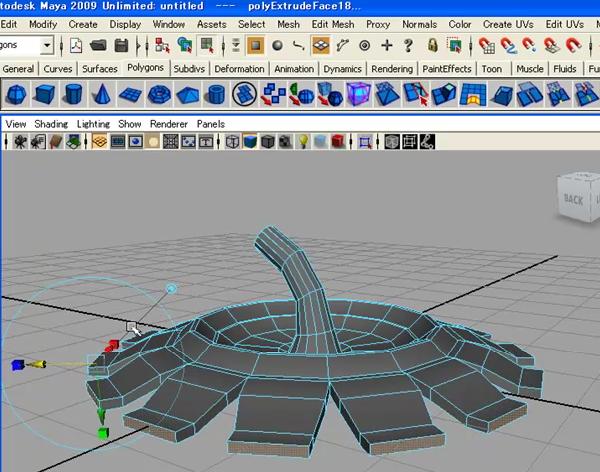
Now the next is to create the cape you almost see on the head of the strawberries make a poly cylinder this time and by extrude you can make the head of the strawberry by extruding the faces but don’t forget to select the keep faces together tool again.