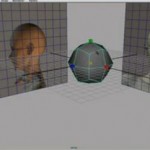
 Here you are learning about Maya workflow with female face modeling. The character model is created with reference image and this reference image can be obtained from any site after downloading from there. Then open that reference image into Maya on simple plane. This female face modeling is all about workflow and this workflow is about setting completely. Convert this reference image into wireframe which helps you to divide the character into different viewports. Let’s start our lesson by creating box, it is better to create box in front viewport. Go to shelf menu and choose polygonal cube there. Select this cube and apply mesh smooth modifier on this cube. It will become aspheric cube. Now assign material to newly created object, just right click on the object and choose material as limber. Choose hyper shade for this object, select any one material and rename it. Adjust setting for this new material and then assign it to selected object in the scene. The aspheric cube doesn’t work well with existing material so change the material again as clear and assign it to the selected object. So this was the workflow setting in Maya and in next part we shall read further concept of Maya. So stay with us and learn more about Maya modeling and animation tutorials.
