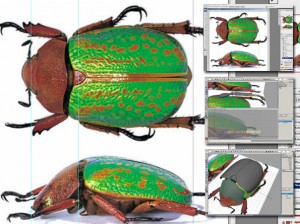
 Learn here in this NURBs 3D modeling tutorial series for the beginners about some specific concept of NURBs modeling. This site is providing you a valuable content and data about 3d modeling and animation. The modeling is performed in two ways, either with Polygon or NURBs. This definite tutorial is presented here just about NURBs tools and commands. As many of you know about NURBs modeling and it works with curved shapes. There are many types of modeling and these are created either with polygonal primitives or NURBs primitives. It is advantage of polygonal modeling that many of models are created with this way easily whereas the NURBs modeling are mostly used when you are going to create any curved shape object. The NURBs modeling is initially started with CV curve, afterward, the curve is modified according to desired shape by using extrude, bevel and revolve commands. So you have to visit our previous tutorial at first to learn about basics of NURBs modeling. There you will find complete guide of NURBs modeling. Once a curve is created, then you can create another one by generating duplicate using mirror command.
In the following tutorial of 3d modeling with NURBs, you are using extend tool to modify the shape of the curve along with required shape. Once you have done this work, then you can create the duplicate surface for right place. Sometimes the duplicate curve is created just for the thickness of the model. Watch this video about NURBs modeling and you will also find some other useful commands for 3d modeling of NURBs. The video link is given at the end and you can get access to it by just clicking on this link.
