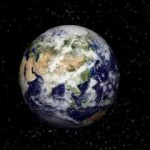
This free tutorial video is captured from a 3 d modeling class of 3d modeling animation software Maya. You can do 3d modeling, 3d animation of the model and then make film of your work in Maya. This free tutorial is about how to use the Camera attributes of Maya. There are many camera options in Maya, you can do complete cinematography of your 3d animation or 3d modeling in Maya and Make a 3d animated film in Maya like original film studio. This free tutorial is about the basics of the Maya camera option. We shall create a 3d model of the earth and then make film of our model in Maya.
-
Steps:
- Create a polygon sphere in Maya and scale it to suitable size, then create another polygon sphere and scale it larger so that the inner sphere is completely surrounded by this sphere.
- Now select the inner sphere and right click and select assign favorite material, choose Lambert.
- In the Lambert attributes click on color’s checker box and click on file icon then select texture of earth which you can download from goolge images. Then hit key ‘6’ and your texture appears on the model.
- Select the bigger sphere and color it dark, hit ‘8’ from keyboard and a new window will appear the select the brush, scroll down to space and choose star like brush.
- In this way you can create a model of earth in space.
- Now is next job of cinematography basics, select the camera from the top menu and then select all the XYZ positions of model in attribute editor and right click, save this scene and go next frame and move the earth model to different position then save this scene again by right clicking the slected orientation and then clicking on save scene.
- Rewind the animation to first frame and play it. You have created a simple film of the earth model in Maya. For better understanding watch this free tutorial video.
