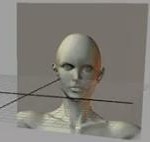
 box modeling the female face
In this tutorial we are required to explain the head modeling of female face. First of all we think it necessary to tell you that this tutorial is here in two parts and this is first part of all. We shall create sculpt for head modeling. As usual go to houseoftutorial.net for taking a reference image for your modeling. There you will find head modeling image and you can take them from any other site also. Download the image from there and save it into your drive. Similarly click the side view image and save it also as side of female head model. Make a new folder for existing file of this project. Go to file menu and choose new scene. It will appear on the screen with default setting, adjust the setting according to the dimension of your project, rename it and press Ok. We need texture effect for our model therefore open the existing reference image folder and drag the image to material editor for texturing. Take two limber and when you right click over them it offers you to rename it. Name these limbers as front and side view of sculpt. Now drag front image and link it with front limber, similarly side limber is for side view of sculpt. Go to polygonal plane and scale it according to your size. Use rotate tool to bring this plane at 90 degree. Right click on that plane and assign selected material as front. The front sculpt will be assigned to that plane. Do the same with next plane and in this way we have got still image for our modeling. Proper model will be designed in next part.
