This free tutorial will tell you how to create joints for 3d organic character. After this video tutorial you will be able to create joints for any organic character including human characters within Maya.
This text tutorial will demonstrate creating joints for 3d characters in Maya. We’ll use a realistic human model and we’ll create joints for the character for animation purpose.
Requirements:
You should have a 3d realistic human character in your scene. The character should be in standing pose with stretched arms out. If you have one of your own, that’s good, otherwise,
Download This Character Now
(Note: this file is of Maya 2009, if you are not using Maya 2009 then maybe you will be unable to open this file in your version of Maya. In this case you will have to use some character of your own for completing this tutorial thanks)
Let’s start lesson,
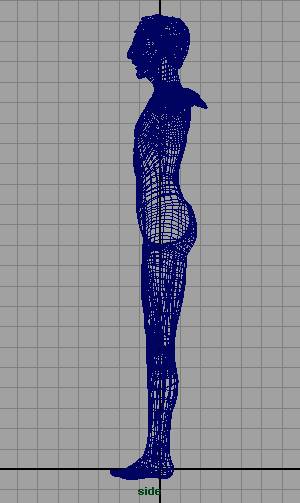
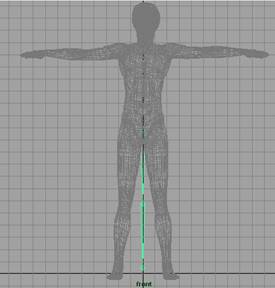
Place your 3d character right on the origin of the grid
Keep the face of human character to the front. (It means when you look through the front camera your character should gaze at you. Character’s front should be in front of you, in front camera.
Go to side view
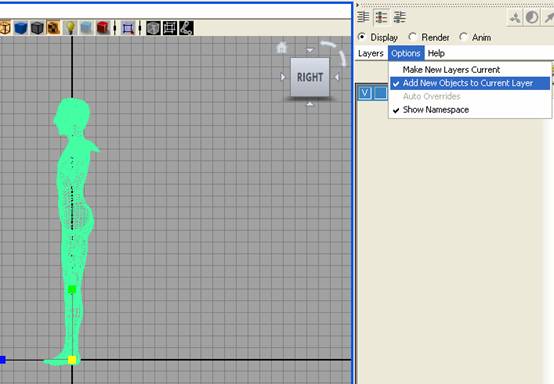
Change the camera to wireframe mode
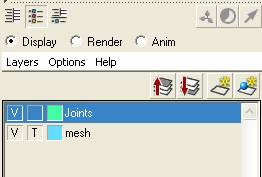
Go to the layer editor and create a new layer
Name the layer, mesh
Select the object and add it to the mesh layer
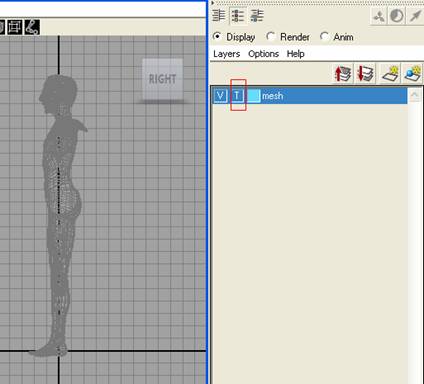
Click the empty square in layer editor right adjacent to the square V
Choose T for when you click in blue empty square
This will make your object a template, and object will become dim
once again you need to create another new layer in layer editor for joints,
let’s do it
Create a New layer change its color and name it Joints
Choose animation Menu Set and Go to the Skeleton Menu
Get Join Tool with default settings
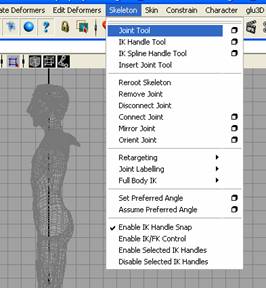
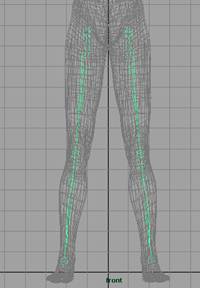
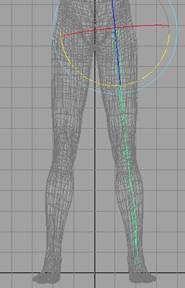
Start creating joints from the hip of human model
Create three joints for leg in side view as shown in image below,

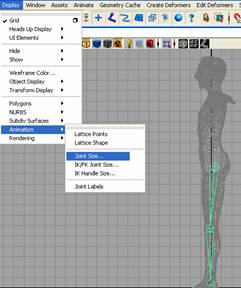
If you see the Joint size is larger or smaller in accordance of the character, you should set the new Joint size from Follow the image below,
Go to front view
Get Move Tool and move the 3 leg joints to the right leg
Get Rotate Tool and rotate 3 leg Joints and fit them in leg, see the image below,
Go to the Skeleton Menu > Mirror Joints > options ![]()
Reset settings and change the Mirror across to YZ
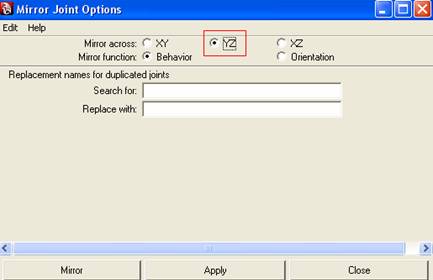
Leave all other settings as it is and hit Mirror,